GBAccelerator DS Installation - DS
- Completely disassemble the bottom half of the DS
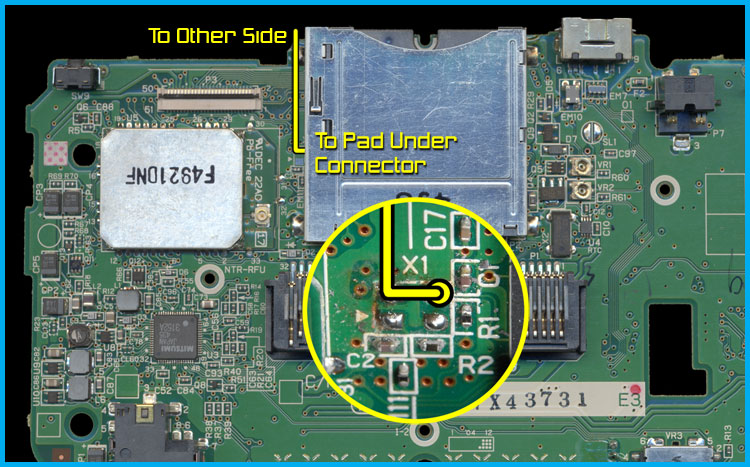
- Desolder the four metal tabs holding the DS game cartridge connector to the PCB. Lift the connector up (the pins will still be connected to the PCB and will act like a hinge)
- Desolder and remove crystal X1
- Solder a wire to the crystal solder pad indicated in the wiring diagram (see yellow circle)
- Re-solder the cartridge connector to the PCB
- Flip the PCB over. Use double-sided tape to stick the GBAccelerator DS chip to the DS board in the position indicated in the diagram
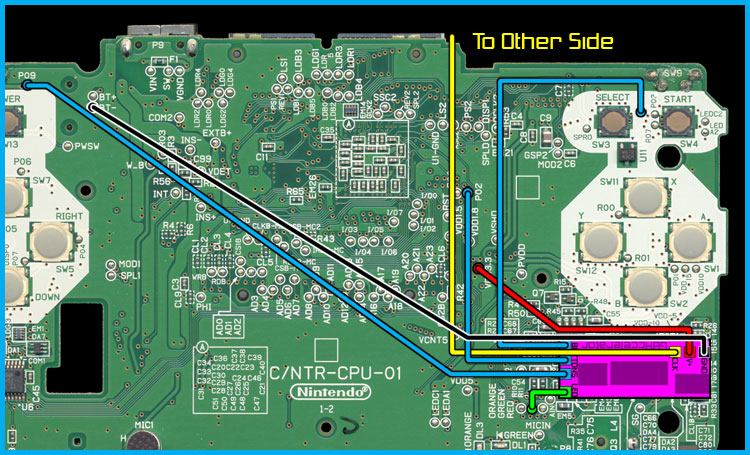
- Connect the remaining wires as indicated in the diagram
- Reassemble the DS
|
||||||||||||||||
|
Installation Tips:
|
||||||||||||||||
|
||||||||||||||||