Midify Your Skull Installation
This tutorial will walk you through installing a Midify Your Skull board into a Gemmy Animated Talking Skull. Gemmy makes several different styles of these skulls, but most of them will work fine.


What You'll Need
- Gemmy Animated Talking Skull
- Midify Your Skull board
- Phillips Screwdriver
- Wire Cutters
- Wire Strippers
- Soldering Iron / Solder
Disassemble the Skull
Remove the 4 screws that hold the two halves of the skull together.
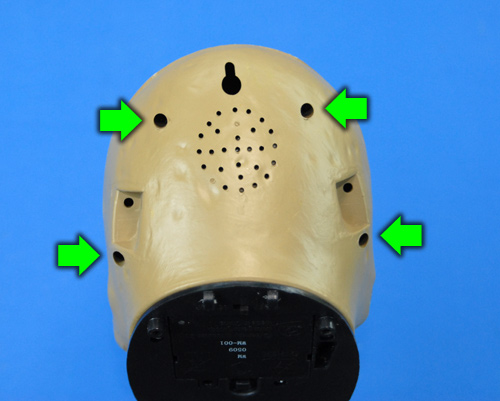
Pull the two halves of the skull apart.
Disconnect the two connectors that connect the two halves of the skull.
(Note: Some versions of the skull are hardwired and don't have connectors. If this is the case, cut the wires as close to the board as possible.)
Remove the smaller of the two connectors by cutting the wires. Put this connector aside as it is no longer needed.
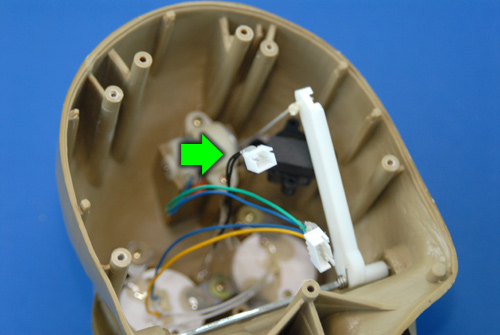
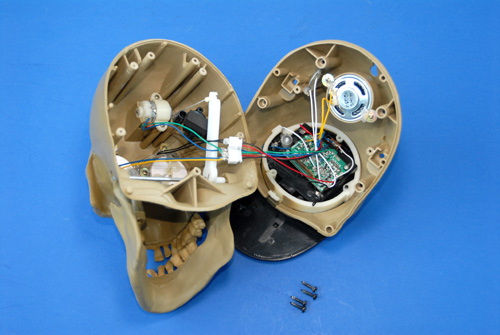
Set the "face" half of the skull aside for now.
Remove the two screws that hold the speaker in place. Save these for later.
Remove the two screws that hold the board in place.
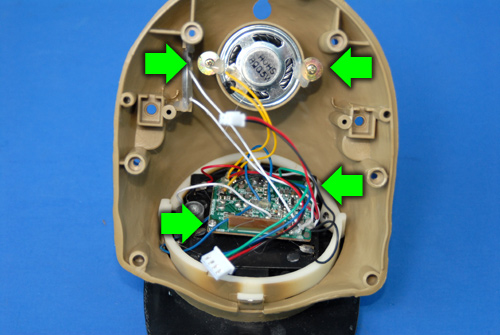
Cut the wires that go from the battery compartment, switch and "Try Me" jack to the board. Make sure to cut them as close to the board as possible as you'll need some length to reattach them to the new board.
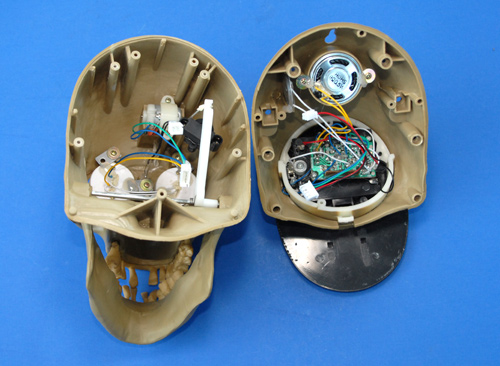
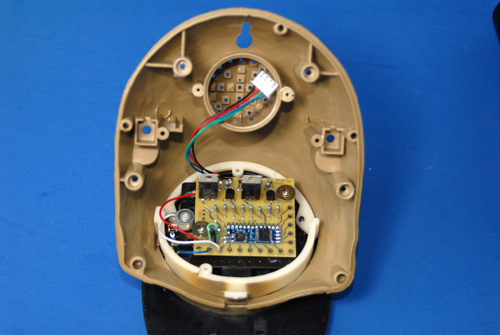
Once the wires have been cut, remove all the old "guts".
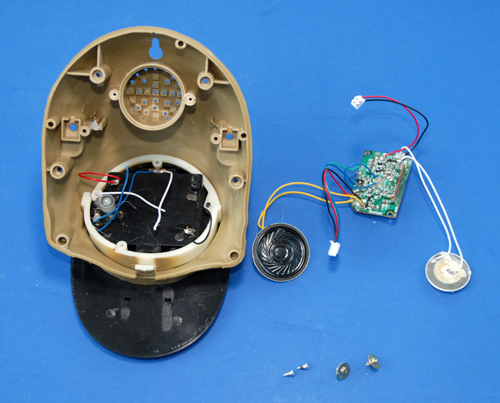
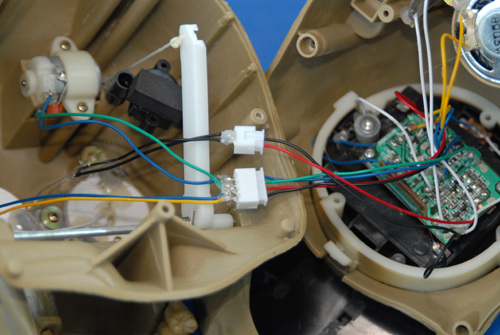
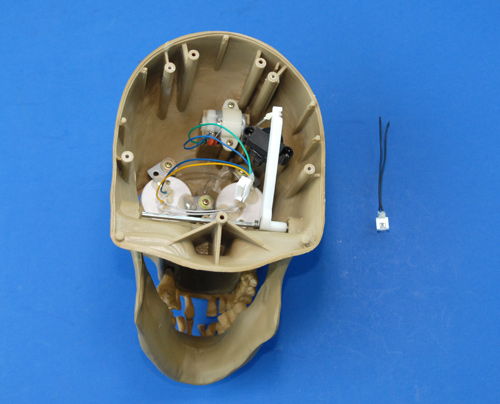
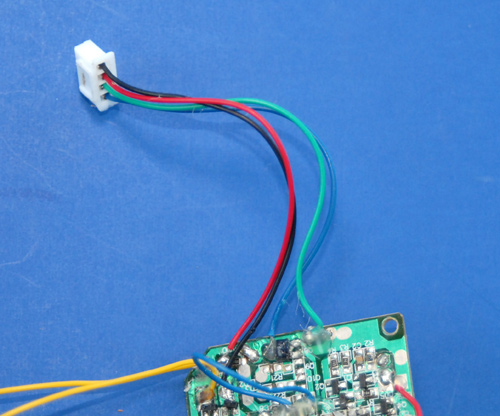
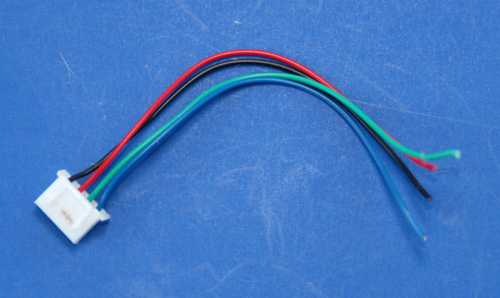
You'll need the 4-pin connector that connects to the face of the skull. Cut this from the old board.
Now you've got everything you need from the old board. You may either toss it or keep it around for science.
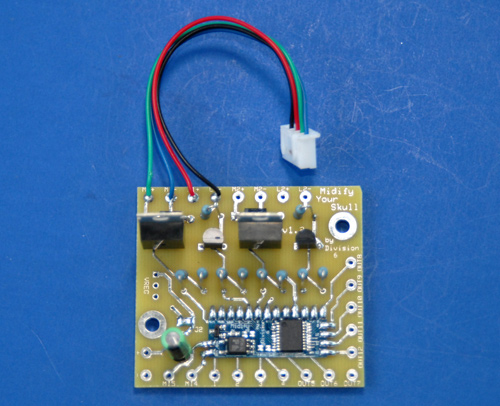
Install the Midify Your Skull Board
Solder the face connector you just removed to the output terminals on the Midify Your Skull board. The wire colors tend to always be the same for this connector, so make the connections as follows:
- M+ (Motor Positive): Green
- M- (Motor Negative): Blue
- L+ (LED Positive): Red
- L- (LED Negative): Black
(Note: If your skull was hard-wired and didn't have a connector, you'll have to solder the face wires directly to the board. The wire colors in these skulls (besides the connectors) tend to be completely random so you'll have to trace them out to figure out which color corresponds to which signal. Keep in mind that polarity does matter for the LEDs/eyes but if you connect the motor backwards it won't make any difference.)
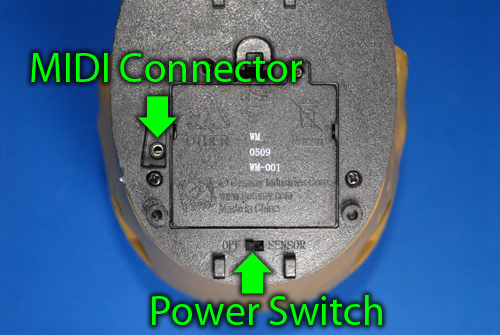
Back on the base of the skull, cut the wire that runs from the switch to the jack. Make sure you cut it as close to the jack as possible, but don't cut the second wire that connects to the same tab on the jack.
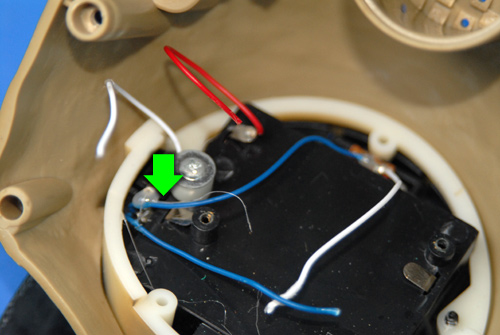
Desolder the wire from the negative (-) tab on the battery compartment (It's black in the pictures, but yours could be any color).
Connect one of the switch wires (white in the pictures) to the negative (-) tab on the battery compartment. This enables you to use the sensor/off switch on the bottom of the skull as a power switch.
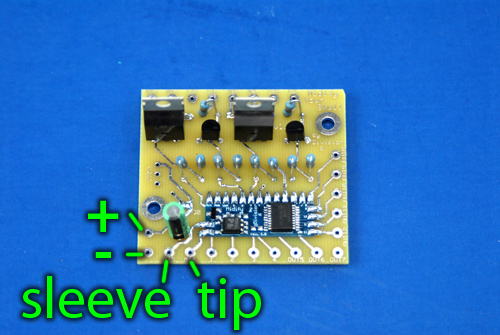
Now you should have 4 wires remaining. Solder these to their corresponding terminals on the Midify Your Skull board.
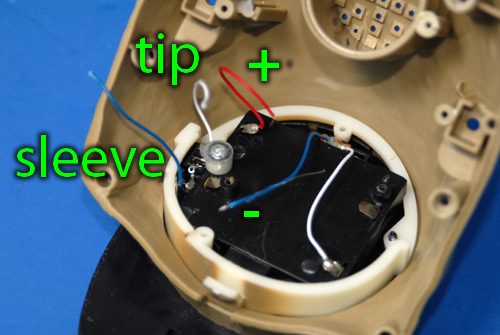
- + (Positive Power): + side of battery compartment, labeled "+" in picture
- - (Negative Power): Switch, labeled "-" in picture
- MI5 (MIDI Pin 5): Jack sleeve, labeled "sleeve" in picture
- MI4 (MIDI Pin 4): Jack tip, labeled "tip" in picture
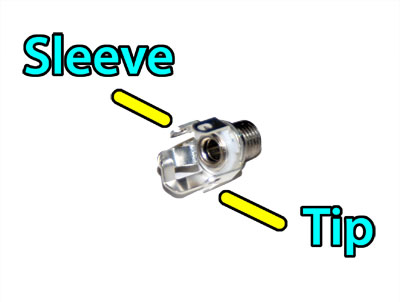
A note about connectors: More and more of these skulls are coming with a white rectangular "Try Me" connector instead of using the round connector. If this is the case, you can drill a hole in the back of the skull and mount the 2.5mm phone jack that was included with your Midify Your Skull kit. If you go this route, here are the tip and sleeve connections you'll hook to the board instead of the wires going to the stock "Try Me" connector:
Reassemble the Skull
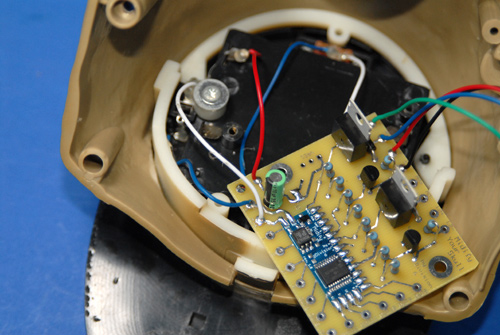
Screw the board into place (where the original board used to be) using the screws you saved from the speaker.
Reconnect the two halves of the skull.

Reassemble the two halves of the skull. As you do so, make sure none of the wires are in a position that would interfere with the lever that operates the jaw.
Replace the 4 screws.

Play With the Skull
That's it, you're done! Connect your newly-modified skull to the MIDI port on your computer, turn it on, build some sequences and have fun scaring your friends.
If you have any problems or questions along the way, please don't hesitate to let us know.